MEDIAL TIBIAL STRESS SYNDROME (SHIN SPLINTS) IN RUNNERS

The Injury
Shin splints or shin pain is clinically referred to as medial-tibial stress syndrome (MTSS). It is an umbrella term that often refers to a number of issues involving pain in the shin area.
At their worst, shin splints can turn into a stress fracture along the tibia, and searing pain will be felt with every stride.
In less severe cases, the muscles and tendons in the shin area may be tender and inflamed, or even develop micro tears near their attachment to the tibia (shin bone); often pain lessens a few miles into the run and builds up again towards the end of a run or afterwards.
Either way, shin pain is a sure-fire way to make your running experience markedly unenjoyable and accounts for approximately 15% of running injuries.
The Symptoms
- Pain along the front and medial (inner) side of the tibia (shin bone).
- Mild cases – pain after running.
- Moderate cases – pain on impact as footstrikes the ground.
- Severe cases – pain standing or just walkingwithout any impact.
- Pain on palpation along the inside edge ofthe tibia. Pain when squeezing/compressing the calf muscle and anterior shin together.
The Causes
Shin pain can most often be traced back to a sudden spike in training volume and intensity. Recent studies indicate the trauma isn’t caused by the direct contact of muscles attaching to the bone.
Instead it happens from the slight bend that occurs during activity in a stress-loaded bone. As your tibia and surrounding muscles strengthen with repeated high-impact activity, the chance of shin splints lessens. Hence why shin splints are more common in those just starting or returning to a running programme.
They are also a sign you could be wearing the wrong shoe or worn out shoes. Running on hard surfaces also increases your risk of developing shin splints. A high BMI and being female are added risk factors for shin splints.
The Fix
When the first twinges of pain strike, reduce your running to a comfortable level for a few days to a week, then slowly increase your mileage using the 5-10% rule (no more than a 10% increase per week). Cross train with cycling, pool running, and swimming.
Include:
- Rest, ice, and ibuprofen (non-steroidal anti- inflammatories) to ease the pain.
- Taping the shin can relieve pain and speed healing. Taping or bracing provides compression to aid relief, but also stabilises the ankle so the shin muscles don’t have to work so hard to support your leg.
- Physiotherapy including mobilisation, soft tissue release, activity modification advice and exercises. These can all promote tissue healing.
- Provided you are pain free when performing exercises, you should do flexibility/mobility activities for your ankle, calf and hip. Followed by strengthening exercises for the entire leg which may include squats, bridging and balance activities.
The Prevention
The easiest and best way to avoid shin splints is to increase mileage gradually, and mix your training surfaces from concrete or asphalt to grass or trails. If you have high arches and a rigid foot then you may need shoes with added support and cushioning.
Work towards having good mobility and stability, not just throughout your ankle and lower leg, but in your entire body.
Strength with mobility means the entire kinetic chain can work together for maximum running efficiency, so take the time to do strengthening exercises daily. Remember a dynamic warm up before a run may prepare better your body for the impact
of running.
Rehabilitation Programme
This programme has some specific exercises for shin splints. You want to strengthen the calf muscles while maintaining good mobility.
It is essential to strengthen your entire lower limb from your pelvis, hips, core and quads. It is important to ensure the exercises are performed with good technique and good postural control.
Make sure to repeat the same number of exercises on both legs. Make sure you are always pain-free and take care not to progress too quickly. We have given suggested sets and repetitions but you can adjust these accordingly based on pain and fatigue levels. The exercise routine should be performed once or twice a day.
Remember everyone is different so your therapist may give guidance that is more specific to you.
Warm Up and Cool Down
If muscles are tight, weak or injured, it is particularly important to warm up (unless advised otherwise by your practitioner) with a brisk walk or a gentle jog at a pain-free pace for 5 minutes before you start your exercises.
This increases your circulation and helps prepare the muscles for the activity to come. When you have finished your exercises, end the session with a 5 minute gentle walk or slow jog to allow your heart rate to slow down gradually.
Exercises
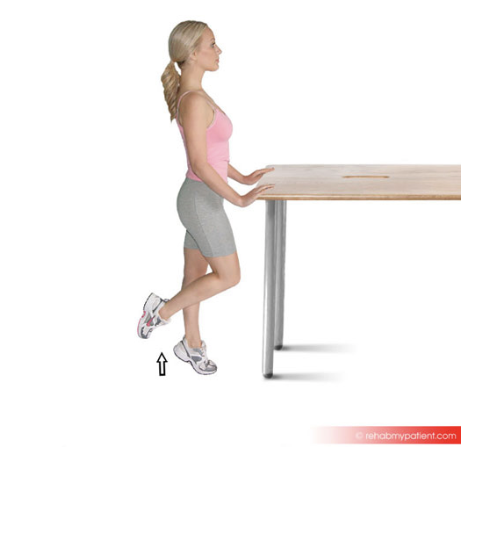
1 Leg Calf Raise
Stand upright on one leg. Slowly raise up onto your toes, and control the movement back down. Hold on to a wall or table for support. This exercise will strengthen the calf muscle and ankle joint.
Perform 3 sets of 15
Supine Bridge Basic
Lie flat on your back, with your knees bent, squeeze your bottom muscles and lift your body upwards. Keep your arms by your side and use them to help you balance. Make sure you maintain good posture (do not over-arch your lower back) and contract the deep abdominal muscles by squeezing your tummy towards your spine. This exercise helps to strengthen the abdominal, lower back, gluteal and hamstring muscles.
Perform 4 sets of 20

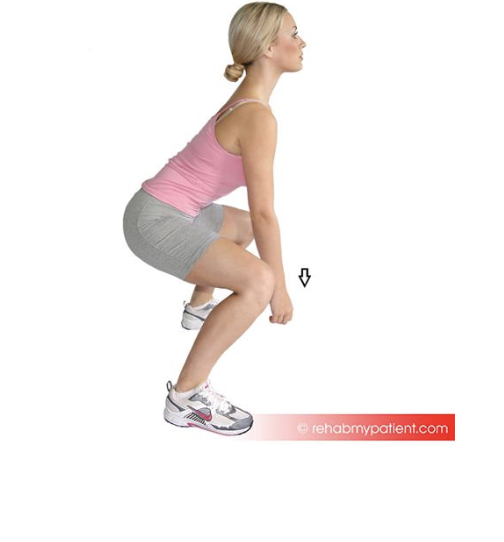
Squats
Open your legs slightly wider than shoulder width, and bend your knees to the full squat (90 degrees) position. Your feet can be pointing directly forwards, or turned out slightly. Make sure you keep the middle of your knee-cap in line with the middle toes of your foot. Always keep your feet flat on the ground.
Perform 3 sets of 25
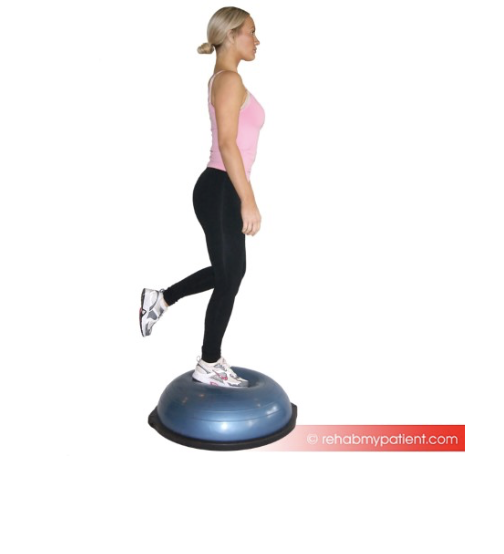
Balance Exercises
Stand on the curved side of the BOSU ball or wobble cushion on one leg. If you do not have these then stand on the floor and close your eyes. Try to keep your balance. Be careful and use a wall for support if required. This is an excellent way to improve balance and leg strength.
Perform balance work for 5-10 mins
Please note: The information contained in this article is intended as general guidance and information only and should not be relied upon as a basis for planning individual medical care or as a substitute for specialist medical advice in each individual case. If in any doubt or your require a more tailored programme please consult with a qualified Physiotherapist.